
5 Steps to installing reverse osmosis system under sink
Let us confront a frustrating reality in the residential water purification industry: consumers routinely spend hundreds of dollars hiring local plumbers to perform a task that requires less than an hour of basic mechanical focus. We refuse to accept the narrative that advanced water filtration requires elite plumbing credentials. If you can operate an adjustable wrench and a power drill, you can execute a flawless, leak-proof installation. Modern engineering has evolved. The era of wrestling with complicated copper sweating and messy PVC glue is over, replaced entirely by precision push-to-connect fittings and modular tankless architectures.

From our experience engineering advanced filtration at Puflow, we know that the secret to a successful deployment lies entirely in preparation and structural understanding. When clients ask us How to install reverse osmosis system under sink, our response is always the same: respect the fluid dynamics, do not rush the drain saddle alignment, and trust the engineering of the quick-connect tubing. When you execute these steps correctly, you secure an infinite supply of 0.0001-micron purified water without paying an arbitrary labor tax to an outside contractor.
In this uncompromising, expert-led guide, we will aggressively dissect the exact mechanical process of How to install reverse osmosis system under sink. We will expose the common failure points where amateur installers cause leaks, provide you with the definitive 5-step roadmap to structural success, and demonstrate why integrating a modern direct-flow unit is the ultimate upgrade for your residential infrastructure.
Table of Contents
- 1. The Preparatory Mandate: Tools and Cabinet Space
- 2. Step 1: Integrating the Cold Water Supply Valve
- 3. Step 2: Engineering the Drain Saddle Connection
- 4. Step 3: Mounting the RO Faucet and TDS Display
- 5. Step 4: Placing and Connecting the Filtration Unit
- 6. Step 5: System Purging and Pressure Verification
- 7. The Puflow Advantage: Direct Flow Engineering
- 8. Summary Matrix: Installation Timeline and Tools
- 9. Frequently Asked Questions (FAQs)
- 10. Authoritative Water Quality References
1. The Preparatory Mandate: Tools and Cabinet Space
Before you even unbox your new equipment, you must assess your operational environment. Mastering How to install reverse osmosis system under sink requires clearing the entire cabinet area beneath your countertop. You cannot work efficiently while dodging old cleaning supplies and garbage bins. Ensure you have the following hand tools prepared: an adjustable crescent wrench, a variable-speed power drill, a 1/4-inch drill bit (for PVC), a specialized diamond hole saw bit (if you need to drill through granite or quartz for the faucet), a utility knife, and a Phillips-head screwdriver.
If your cabinet space is severely restricted or you lack an available electrical outlet beneath the sink, you may need to pivot your strategy. While under-counter units provide the highest volume, space-constrained environments are often better served by exploring our Countertop RO Systems or our specialized Portable & Non-Electric units. However, if you are committed to achieving maximum output without compromising your countertop aesthetics, proceed to the first mechanical phase.
2. Step 1: Integrating the Cold Water Supply Valve

The foundational rule of How to install reverse osmosis system under sink begins with securing your source water. You must identify the cold water angle stop valve beneath your sink—never tap into the hot water line, as high temperatures will instantly destroy the delicate reverse osmosis membrane. Turn the cold water valve firmly clockwise until it is completely shut off. Open your existing kitchen faucet to relieve any residual pressure in the line.
Disconnect the existing cold water braided hose from the angle valve using your adjustable wrench. Take the provided T-adapter (feed water valve) from your Puflow kit and thread it directly onto the angle valve. We recommend applying exactly three wraps of Teflon tape to the male threads to ensure a watertight seal, though many modern adapters utilize rubber O-rings that do not require tape. Once the T-adapter is secure, reattach your original braided kitchen faucet hose to the top of the T-adapter. You now have a dedicated, valve-controlled port ready to feed municipal water directly into your filtration system.
3. Step 2: Engineering the Drain Saddle Connection
This step is where amateurs historically fail, resulting in foul odors or slow leaks. Reverse osmosis systems flush rejected impurities (brine) down the drain. You must create a secure pathway for this wastewater. Locate a vertical section of your PVC drain pipe, ensuring it is positioned above the P-trap (the U-shaped bend that holds water to block sewer gases). If you install the saddle below the P-trap, sewer gases will vent backward into your kitchen.
Using your power drill and a 1/4-inch bit, drill a single, clean hole through one side of the vertical PVC pipe. Do not drill through both sides. Take the provided foam gasket and align its hole perfectly with the hole you just drilled. Place the front half of the drain saddle over the gasket, insert the wastewater tubing, and bolt the back half of the saddle tightly around the pipe. From our experience, ensuring the wastewater tube does not push too deeply into the PVC pipe is critical; if it hits the opposite wall of the pipe, it will choke the flow, causing the RO system's internal pressure to violently back up.
4. Step 3: Mounting the RO Faucet and TDS Display
If your sink already features a standard 1-inch soap dispenser hole or a blank cover plate, you can bypass the drilling process entirely. If you have a solid slab of granite, quartz, or marble, you must use a specialized diamond-grit hole saw. We recommend creating a small dam of plumber's putty around the drilling area and filling it with water to keep the diamond bit cool and prevent the stone from cracking due to thermal shock.
Once the hole is established, feed the base stem of the designated RO faucet down through the countertop. Modern smart faucets, specifically those included with our premium New Arrival reverse osmosis system for home, often feature integrated digital TDS (Total Dissolved Solids) displays. This requires feeding a small data cable down through the hole alongside the primary water tubing. Secure the faucet from beneath using the provided mounting plate, lock washer, and securing nut. Tighten it firmly to ensure the faucet does not swivel or shift during daily use.
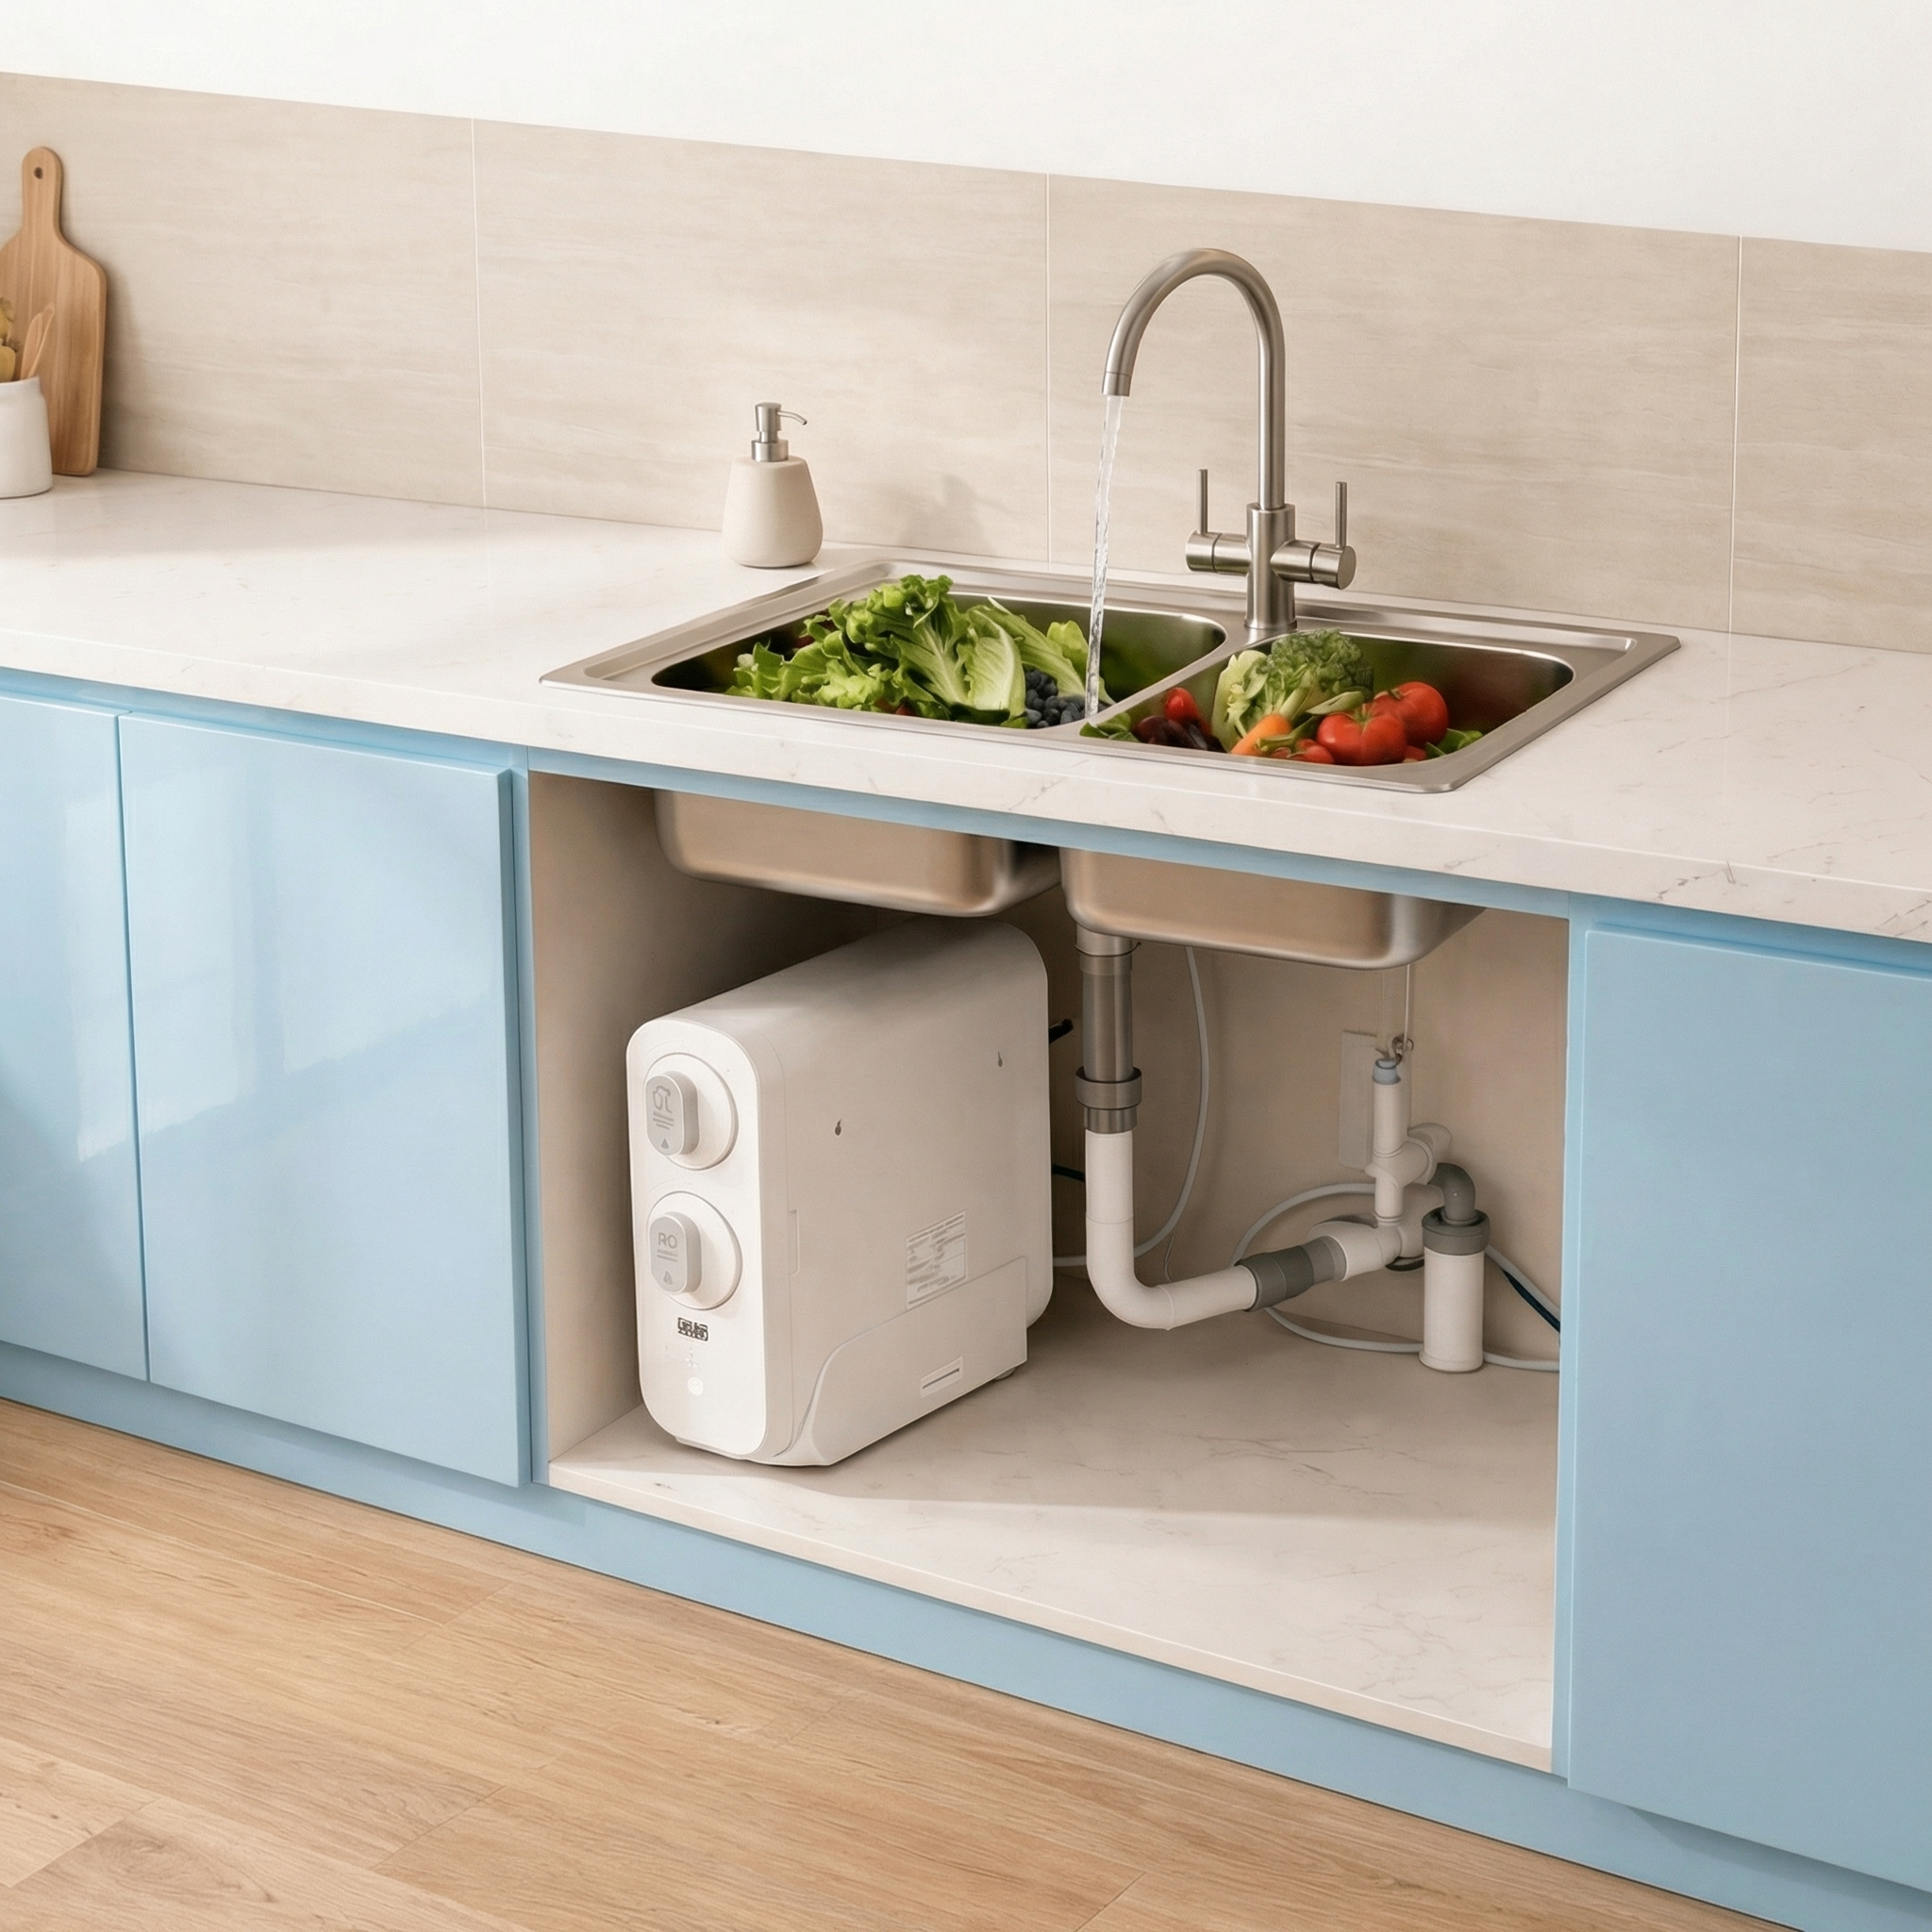
5. Step 4: Placing and Connecting the Filtration Unit
With your source water tapped, your drain secured, and your faucet mounted, you are ready to position the primary engine of your purification system. For those who demand uncompromising performance, we advocate for upgrading to High-Flow RO Systems that utilize a tankless, direct-flow architecture. Old-fashioned systems rely on bulky, pressurized reserve tanks that consume massive amounts of cabinet space and serve as potential breeding grounds for secondary bacterial contamination. Tankless systems purify water on demand.
Slide the main chassis of your Under-Sink RO Systems into the cabinet. You will now make three primary tubing connections: the feed water line, the wastewater drain line, and the pure water faucet line. Puflow systems utilize advanced John Guest-style push-to-connect fittings. To properly execute this step of How to install reverse osmosis system under sink, cut the plastic tubing perfectly square using a utility knife. Push the tubing firmly into the designated collet on the machine until you feel it hit the internal stop (usually about 5/8 of an inch deep), then pull back slightly to lock the internal stainless steel teeth into the plastic. Slide the locking clip into place. This connection is mathematically designed to hold pressure without leaking.
6. Step 5: System Purging and Pressure Verification
Do not immediately drink the water. You must purge the system. Turn on the cold water supply valve beneath your sink, then slowly open the T-adapter valve feeding the RO unit. Plug the unit into the electrical outlet. Turn the RO faucet on your countertop to the open position.
For the first few minutes, you will hear the internal booster pump engage, and the water sputtering out of the faucet may appear cloudy or contain black flecks. This is completely normal; it is simply the harmless carbon fines being flushed from the new post-carbon filters. From our experience, you must allow the system to run continuously for roughly 15 to 20 minutes to thoroughly rinse the 0.0001-micron membrane and saturate the media. While the system is flushing, use a flashlight to meticulously inspect every single push-connection and valve beneath the sink for micro-leaks. If a fitting weeps a single drop of water, turn off the supply, push the tubing deeper into the collet, and re-test.
7. The Puflow Advantage: Direct Flow Engineering
We refuse to manufacture outdated technology. Understanding How to install reverse osmosis system under sink is only valuable if the hardware you are installing is capable of supporting a modern household. The days of waiting twenty minutes for a tiny pressurized tank to fill a single pitcher are over.
Under Sink RO System 600 GPD Direct Flow TDS Display (Model: A9-600)
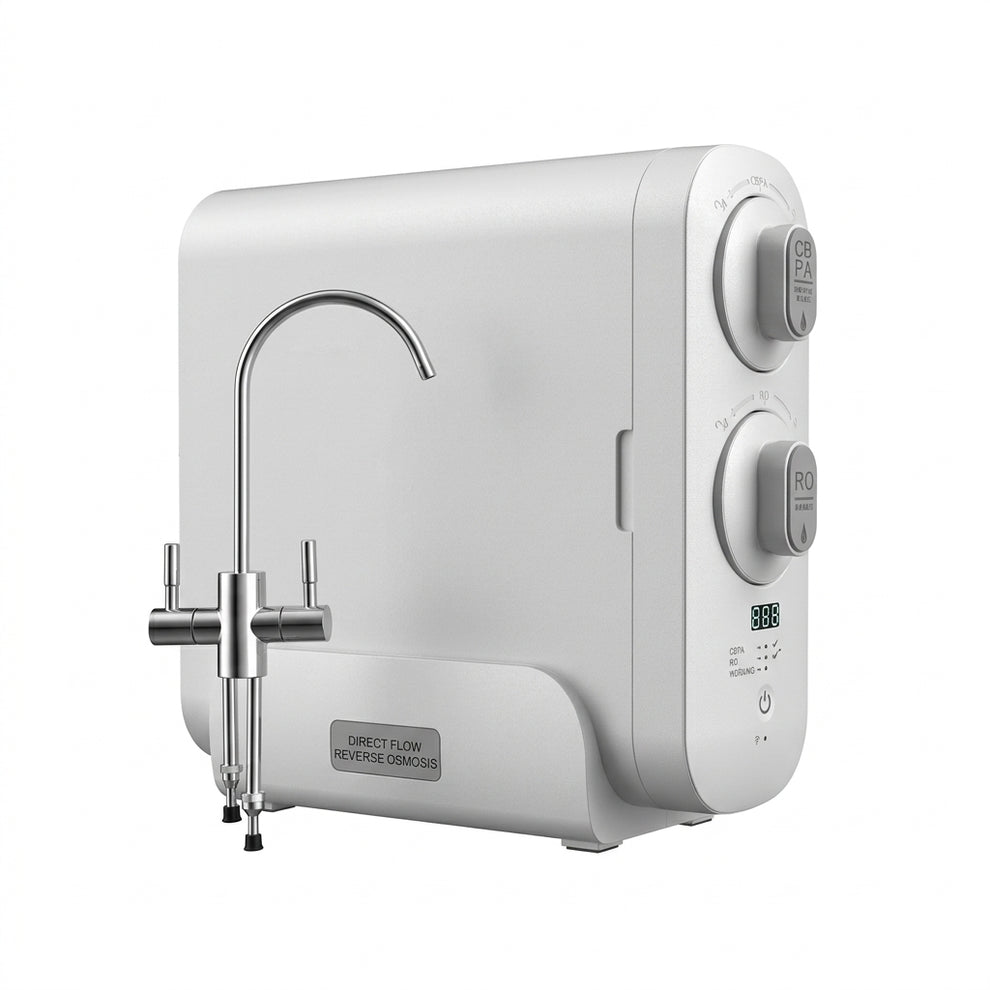
This is the apex of residential water purification. The A9-600 completely eradicates the need for a storage tank by utilizing an aggressive 600 Gallon Per Day (GPD) membrane, driven by a 70W internal booster pump that operates silently between 0.1–0.6 MPa working pressure. It delivers a massive flow rate of 1.5–1.6 L/min, instantly filling your glass.
Furthermore, standard RO systems waste up to four gallons of water for every one gallon purified. The A9-600 boasts a highly efficient 1.5:1 wastewater ratio with an incredible 60% recovery rate and a 95% salt rejection rate. Its compact dimensions (17.1 × 6.3 × 15.7 in) allow it to slide effortlessly into tight cabinetry, making it the premier choice when browsing our All products reverse osmosis system for home catalog.
For regions suffering from extreme drought where municipal hookups are unstable, we even recommend expanding your technological footprint by integrating an Atmospheric Water Generator, but for sheer high-volume residential deployment, the A9-600 remains unmatched. Keep in mind that maintaining this efficiency requires strict adherence to replacement schedules; you must secure verified Replacement Filters to ensure the 0.0001μm filtration precision never degrades.
8. Summary Matrix: Installation Timeline and Tools
To assist your planning, we have synthesized the core requirements for executing a flawless installation into an uncompromising reference matrix.
| Installation Phase | Required Tools | Estimated Time | Critical Warning |
|---|---|---|---|
| Cold Water Integration | Adjustable Wrench, Teflon Tape | 10 Minutes | Never connect to the hot water line; heat destroys RO membranes. |
| Drain Saddle Alignment | Power Drill, 1/4" Bit | 15 Minutes | Must drill above the P-Trap to prevent sewer gas venting. |
| Faucet Mounting | Diamond Hole Saw (if cutting stone) | 20 Minutes | Use a putty water dam to cool the diamond bit and prevent stone cracking. |
| Tubing Connections | Utility Knife | 5 Minutes | Cut tubing perfectly square; push fully into the collet and lock. |
| System Purging | Flashlight (for leak checks) | 20 Minutes | Do not drink the initial flush; allow carbon fines to clear entirely. |
9. Frequently Asked Questions (FAQs)
Do I need a professional plumber to install a tankless RO system?
No. If you have thoroughly reviewed our guide on How to install reverse osmosis system under sink and possess basic mechanical competency, hiring a plumber is a waste of capital. Modern tankless systems like the Puflow A9-600 utilize color-coded, push-to-connect fittings that completely eliminate the need for advanced pipe threading or soldering.
Why is my new RO system making a vibrating noise when I turn the faucet on?
If you have installed a high-flow, tankless system, the noise you hear is the internal electronic booster pump activating. Because tankless systems purify water on demand rather than storing it, the pump must engage immediately to force the tap water through the extremely dense 0.0001-micron membrane. It is a sign of a healthy, high-pressure system operating correctly.
How tight should I make the push-to-connect plastic tubing?
You do not twist or tighten push-to-connect fittings. You simply push the square-cut plastic tubing straight into the fitting until you hit the internal backstop. Once seated, give the tubing a gentle pull backward. This engages the internal stainless steel teeth, locking the tube permanently in place. Adding external clamps or attempting to glue these fittings will actively cause them to fail and leak.
10. Authoritative Water Quality References
To ensure your household water purification strategy aligns with rigorous scientific standards, we strongly advise consulting the following verified environmental resources:
- U.S. Environmental Protection Agency (EPA) - Drinking Water Guidelines: The definitive federal authority detailing acceptable thresholds for Total Dissolved Solids (TDS), heavy metals, and the operational necessity of point-of-use filtration in aging municipal grids.
- Water Quality Association (WQA): The premier global trade association providing peer-reviewed engineering data, rigorous certification standards, and operational guidelines for reverse osmosis membrane technology and residential water treatment systems.