


How Often Should I Empty a Reverse Osmosis Tank? The Industry Field Guide
Most homeowners assume that because reverse osmosis water is purified to near-distilled clarity, it stays fresh indefinitely inside an under-sink pressure tank. That assumption is one of the most common and costly misconceptions in residential water treatment. You invest in a multi-stage filtration unit to remove heavy metals, dissolved salts, and emerging chemical pollutants, yet after several months, the water from the faucet begins to taste stale, faintly metallic, or flat. In severe cases, the faucet output drops to a weak trickle even though the steel reservoir feels heavy beneath your counter. Understanding precisely when, why, and how to empty a reverse osmosis tank is not an optional maintenance chore. It is an essential procedure that preserves water purity, prevents bacterial contamination within the rubber bladder, protects your filtration membrane from damaging backpressure, and ensures your system continues to deliver crisp drinking water every day.

Quick Answer: The Mandatory RO Tank Draining Schedule
To keep your drinking water fresh and protect the internal pressure bladder, follow this operational schedule: empty a reverse osmosis tank completely every 2 to 4 weeks as routine maintenance. Additionally, you must perform a mandatory full flush under three specific conditions: (1) every 6 to 12 months during filter replacement and chemical sanitization; (2) immediately upon returning from any vacation or absence exceeding 4 days; and (3) flushing 2 to 3 full consecutive tanks when commissioning a brand-new system or installing a replacement RO membrane. If you notice a gradual drop in faucet pressure, a heavy but unresponsive reservoir, or a rubbery odor in your glass, empty the tank immediately and check the bottom Schrader valve air pressure. For households seeking to eliminate water stagnation and storage bladder maintenance altogether, switching to direct-flow solutions from our High-Flow RO Systems collection provides fresh, on-demand purification without an under-sink storage vessel.
Article Directory
- Anatomy of an RO Storage Tank: How the Bladder & Air Chamber Work
- Quick Summary Table: Tank Draining Frequency by Operational Scenario
- 4 Critical Reasons Why You Must Empty Your Storage Reservoir
- Step-by-Step Procedure: How to Properly Drain and Flush an RO Tank
- Featured Tankless Alternative: Puflow TM8-2 Ultrafiltration System
- Direct Technical Comparison: Tank-Based RO vs. Tankless Direct-Flow vs. Ultrafiltration
- Pros and Cons of Regular Storage Tank Maintenance
- Who Needs a Tank-Based System vs. Who Should Switch to Tankless
- Common Mistakes Homeowners Make When Emptying an RO Tank
- Essential Sourcing Checklist: Bladders, Air Charges, and Replacements
- Expert Water Specialist's Recommendation
- Frequently Asked Questions
- Authoritative Standards & Industry Citations
Anatomy of an RO Storage Tank: How the Bladder & Air Chamber Work
To understand why you need to empty a reverse osmosis tank regularly, you must look at how hydropneumatic storage reservoirs function. A standard reverse osmosis membrane purifies water slowly, typically generating only 2 to 4 ounces of purified permeate per minute under municipal tap pressure. Because that rate is too slow to fill a drinking glass directly, traditional systems store purified water in an under-sink hydropneumatic pressure tank.
Inside the exterior steel or composite shell sits a flexible, food-grade virgin butyl or polyisoprene rubber diaphragm that divides the internal cavity into two sealed chambers:
- The Upper Water Chamber: Lined with virgin polypropylene to prevent purified water from touching raw steel, this upper dome holds the filtered water.
- The Lower Pressurized Air Chamber: Beneath the rubber diaphragm lies an air cushion pressurized to 7 to 8 pounds per square inch (psi) when the tank is empty. A standard Schrader valve (identical to a car tire valve) sits at the base or lower side of the tank to adjust this cushion.
As purified water trickles in from the membrane, it pushes the rubber diaphragm downward, compressing the air cushion beneath it. When you open the dedicated kitchen counter faucet, that compressed air pushes upward against the diaphragm, expelling water through your post-carbon polishing filter and out of the spout at a steady rate of 0.5 to 1 gallon per minute.
From our experience servicing residential installations, this physical design creates a performance trade-off. As the tank fills and the air compresses toward 35 to 40 psi, it generates continuous backpressure against the semi-permeable membrane. This backpressure reduces net driving pressure, lowers the system's rejection rate, and increases the ratio of wastewater sent down the drain. If water sits undisturbed in this compressed environment for weeks, the water loses dissolved oxygen, picks up volatile odors from the flexible diaphragm, and creates ideal conditions for biofilm growth. Regular maintenance, backed by guidance from our Best Reverse Osmosis System for Home resource, keeps your water tasting fresh and your equipment operating efficiently.
Quick Summary Table: Tank Draining Frequency by Operational Scenario
| Operational Trigger / Scenario | Recommended Draining Frequency | Action Required | Primary Problem Prevented |
|---|---|---|---|
| Routine Household Use | Every 2 to 4 Weeks | Open faucet completely until flow drops to a slow drip | Water stagnation, flat taste, and early biofilm growth |
| Scheduled Filter Replacement | Every 6 to 12 Months | Full drain, chemical sanitization, and air pre-charge check | System-wide bacterial colonization and mold accumulation |
| Vacation or Inactivity (>4 Days) | Immediately Upon Return | Drain completely, let refill, and discard the first full tank | Elevated total dissolved solids (TDS) and rubber off-gassing |
| New System / Membrane Installation | At Initial Commissioning | Fill and completely drain 2 to 3 consecutive tanks | Residual food-grade sanitizers and carbon fines in water |
| Sluggish Faucet Flow / Heavy Tank | As Needed (Troubleshooting) | Empty tank and test Schrader valve with a digital tire gauge | Bladder waterlogging and improper air cushion pressure |
4 Critical Reasons Why You Must Empty Your Storage Reservoir
1. Eliminating Stagnant Water and Biofilm Accumulation
Municipal tap water contains disinfectant residuals such as chlorine or chloramines that suppress bacterial reproduction in distribution pipes. However, the activated carbon pre-filters and polyamide thin-film composite (TFC) membrane inside a reverse osmosis unit strip away 99% of that disinfectant. The water entering your storage reservoir is essentially unchlorinated.
While RO water is remarkably clean, no residential under-sink system operates in a sterile vacuum. Airborne heterotrophic bacteria can migrate backward through the faucet spout, past the post-carbon filter, and settle on the moist rubber diaphragm. If you never empty a reverse osmosis tank, non-pathogenic environmental microorganisms form an invisible, slimy layer called biofilm on the rubber surface. Draining the tank every few weeks flushes these organisms before they colonize the reservoir, maintaining standards aligned with an authentic NSF Certified Reverse Osmosis System.
2. Preventing Total Dissolved Solids (TDS) Creep Contamination
When an RO system stops filtering water because the tank is full, the membrane sits balanced between pressurized feed water on one side and pure permeate on the other. Without active flow across the membrane surface, dissolved mineral ions naturally diffuse across the thin-film barrier through passive osmosis, a process known in the water industry as TDS creep.
When you draw a single glass of water, the automated shut-off valve opens momentarily, washing that initial high-TDS water directly into your storage reservoir. Over weeks of short, intermittent draws (filling an espresso cup or small water bottle), mineral concentrations accumulate at the bottom of the tank. Completely emptying the reservoir flushes this concentrated mineral buildup, resetting the baseline purity you expect when comparing RO Water vs Tap Water.
3. Exercising the Butyl Bladder and Diagnosing Waterlogging
Rubber diaphragms are mechanical components that require periodic physical movement. In households where only small amounts of water are drawn each day, the bladder remains permanently compressed at the bottom of the cylinder under high tension. Over time, that constant compression accelerates elastomer fatigue, making the rubber stiff and brittle.
Emptying the tank allows the diaphragm to cycle through its full mechanical range of motion, helping preserve its flexibility. Furthermore, regular draining serves as a built-in diagnostic test. If you open your faucet and only get two cups of water before the stream dies to a trickle, but the tank is heavy when you lift it, your tank is waterlogged. That means the air cushion has leaked through the Schrader valve, or the bladder has torn. Regular draining helps you catch this issue before the bladder fails completely.
4. Eliminating Chemical and Rubber Taste Off-Gassing
Modern pressure tanks use food-grade butyl or synthetic rubber bladders. However, water is a universal solvent. When purified water—stripped of minerals and sitting at a slightly acidic pH between 6.0 and 6.5—remains in contact with synthetic rubber for weeks in a warm under-sink cabinet, it absorbs volatile organic compounds from the rubber compound. This gives the water an unmistakable rubbery, stale taste. Periodic purging clears out stale water, so you always drink fresh water that has passed cleanly through your final inline carbon block filter.
Step-by-Step Procedure: How to Properly Drain and Flush an RO Tank
Emptying your storage tank is a straightforward maintenance task that takes only a few minutes of active attention. Follow this process to flush your reservoir without damaging components or splashing water under your sink:
- Isolate or Maintain the Cold Water Supply: If you are simply doing a routine 2-to-4-week water refresh, leave the cold water supply valve open. If you are preparing to change filters, sanitize the system, or check the air pressure with a digital gauge, shut off the cold water angle-stop valve feeding the system.
- Lock Open the RO Dispensing Faucet: Flip the dedicated drinking water faucet handle upward so it locks into continuous-flow mode. Water will surge out under normal pressure as the compressed air cushion expels stored volume.
- Monitor the Stream Until Empty: Let the water flow into your sink until the strong stream tapers down to a thin trickle (roughly the thickness of a pencil lead). Once the stream drops to a trickle, the storage reservoir is empty. The remaining trickle is water passing directly across the membrane in real time.
- Troubleshoot Tank Weight: Lift the tank gently. It should feel lightweight, like an empty metal canister. If it still feels heavy, the air bladder has lost pressure and needs attention (see our troubleshooting section below).
- Allow the Tank to Refill Completely: Close the counter faucet and ensure the cold water supply valve is turned on. An average 3.2-gallon tank requires 2 to 3 hours to refill completely, depending on your home's water pressure and temperature. If you are returning from vacation, discard this first full tank by draining it once more before using the water for cooking or drinking.
For systems equipped with post-mineral cartridges, regular tank purges also help balance remineralization levels, as detailed in our guide on the Under Sink Reverse Osmosis System with Remineralization.
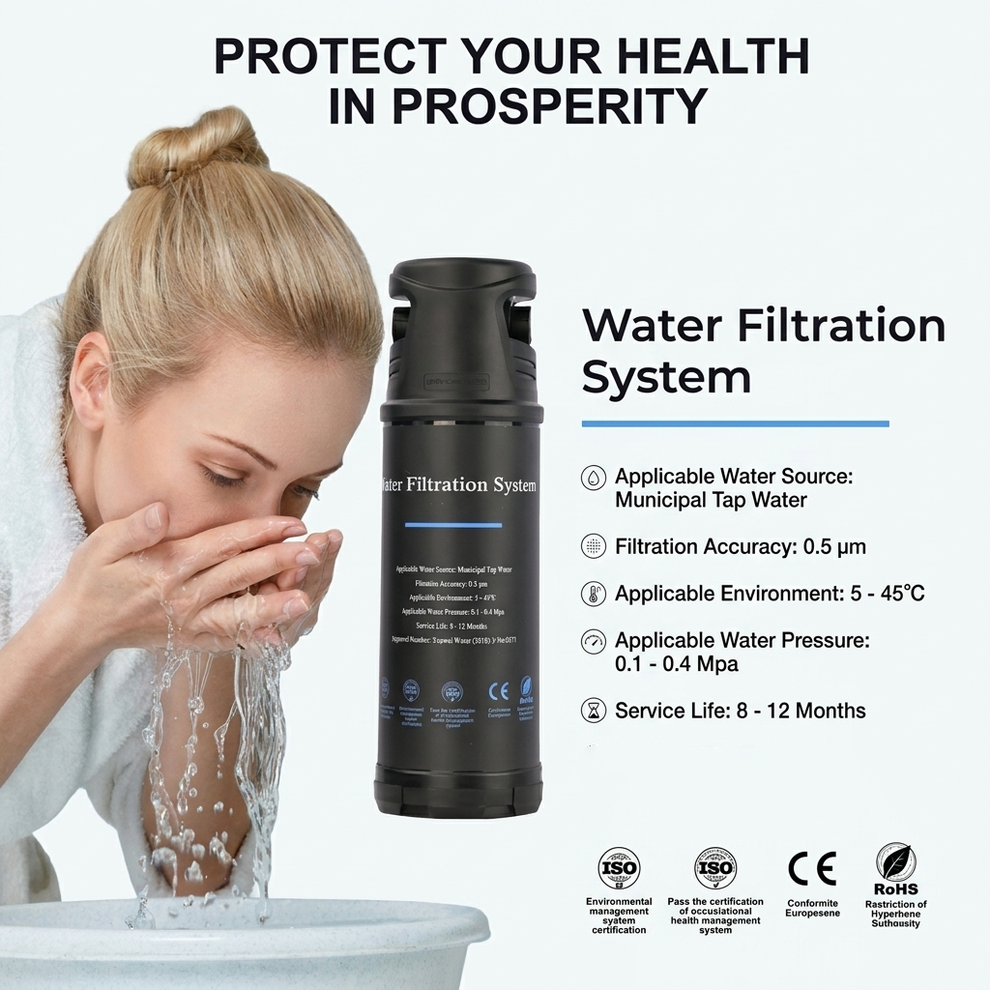
Alternative Solution: Puflow TM8-2 Tankless Ultrafiltration System
If you are tired of checking air pressures, sanitizing rubber bladders, and wondering whether to empty a reverse osmosis tank every few weeks, switching to a tankless ultrafiltration system eliminates storage headaches entirely. The Puflow TM8-2 delivers direct-flow, multi-stage filtration without an under-sink storage reservoir.
| Filtration Accuracy | 0.01 μm hollow-fiber ultrafiltration membrane |
| Continuous Flow Rate | High flow up to 400 Liters per hour (no storage tank delays) |
| Operating Pressure | 0.1 – 0.4 MPa (functions on standard line pressure) |
| Power Requirement | Zero electricity required (pure mechanical filtration) |
| Under-Sink Footprint | Ultra-compact 130 × 110 × 345 mm form factor |
| Water Conservation | Zero wastewater generation (100% water recovery ratio) |
Filtration Specialist Verdict: If your municipal water does not have high salinity or heavy metals that require an RO membrane, the TM8-2 removes cysts, bacteria, and microplastics while preserving natural healthy minerals, all without storage tank maintenance. Explore the complete TM8-2 Under Sink Water Filter System or browse our broader Under-Sink RO Systems catalog.
Direct Technical Comparison: Tank-Based RO vs. Tankless Direct-Flow vs. Ultrafiltration
| Performance Attribute | Traditional Tank-Based RO Systems | Modern Tankless Direct-Flow RO | Direct-Flow Ultrafiltration (Puflow TM8-2) |
|---|---|---|---|
| Tank Emptying Required? | Yes; mandatory every 2 to 4 weeks | No; on-demand real-time filtration | No; direct-flow without storage |
| Water Stagnation Risk | High if left unused for days | Extremely low (no standing reservoir) | Zero (flow on demand) |
| Wastewater Drain Ratio | High (3:1 to 4:1 due to tank backpressure) | Low (1:1 to 1.5:1 with booster pump) | Zero (100% water recovery ratio) |
| Initial Dispensing Flow Rate | Fast (0.8 – 1.0 GPM from air bladder) | Moderate to Fast (0.4 – 0.8 GPM direct) | Very Fast (1.5 – 2.0 GPM on line pressure) |
| Under-Sink Space Required | Large; requires room for a 3-to-4 gallon tank | Compact; slimline upright cabinet | Minimal; fits into narrow corners |
| Power Requirement | None (unless equipped with booster pump) | Requires 110V electrical outlet under sink | None (runs purely on mechanical line pressure) |
| Target Contaminants | Dissolved solids, lead, fluoride, PFAS, nitrates | Dissolved solids, lead, fluoride, PFAS, nitrates | Suspended particles, bacteria, microplastics, chlorine |
Pros and Cons of Regular Storage Tank Maintenance
| Maintenance Approach | System & Health Benefits (Pros) | Operational Drawbacks & Trade-Offs (Cons) |
|---|---|---|
|
Disciplined Tank Draining (Every 2-4 weeks + annual sanitize) |
|
|
|
Passive Neglect (Never emptying or checking the tank) |
|
|
Who Needs a Tank-Based System vs. Who Should Switch to Tankless
Every home has different plumbing setups, water usage habits, and kitchen layouts. Understanding these factors helps you decide whether maintaining a tank-based system makes sense, or if upgrading to a tankless design is the better long-term choice.
Who Should Keep and Maintain a Tank-Based RO System:
- Homes Without Electrical Outlets Under the Sink: Traditional pressure tanks operate purely on mechanical line pressure and compressed air. If your kitchen island or sink cabinet lacks a 110V GFCI outlet, a tank-based system or a non-electric setup from our Portable & Non-Electric collection delivers purified water without hiring an electrician.
- Properties with Low or Fluctuating Water Pressure: If your well pump or municipal feed drops below 40 psi, high-output tankless systems struggle to push water through dense membranes without noisy booster pumps. A tank slowly accumulates water overnight, ready for high-flow dispensing whenever you open the tap.
- Budget-Focused Homeowners: Traditional tank-based systems have lower upfront costs, and standard replacement filters are widely available. If you do not mind spending two minutes every few weeks to empty a reverse osmosis tank, a standard unit provides excellent value.
Who Should Switch to a Modern Tankless System:
- Small Kitchens and Compact Cabinets: An RO storage tank measures roughly 11 inches in diameter and 15 inches tall, consuming valuable space under your sink. A slim, direct-flow unit frees up cabinet space for pull-out trash bins and cleaning supplies.
- Frequent Travelers and Vacation Homeowners: If your home sits unoccupied for weeks at a time, stagnant water in a storage tank is a constant headache. A tankless unit filters water on demand, so your first glass after a trip is as fresh as the last.
- High-Volume Cooking and Entertaining Households: When a 3-gallon tank runs dry, you must wait hours for it to refill. High-flow tankless systems produce 600 to 1,000 gallons per day, providing a continuous stream of filtered water for large stockpots and gatherings without running out. If you are comparing system footprints, our review of Countertop RO Systems offers additional compact options.
Common Mistakes Homeowners Make When Emptying an RO Tank
Field Service Warning: Never attach a tire pump or air compressor to an RO tank while it is full of water. Adding air pressure to a full tank compresses the internal bladder against the water, stretching the rubber unevenly and risking an internal rupture that ruins the reservoir.
- Pumping Air Into a Water-Filled Tank: When a tank loses pressure and water flow slows to a trickle, homeowners often grab a bicycle pump and add air while the tank is full. This is a critical mistake. To calibrate pre-charge air pressure correctly, the tank must be completely empty with the sink faucet open to relieve water pressure. Only then should you use a digital gauge to check that the air cushion sits at 7 to 8 psi.
- Using Concentrated Household Bleach to Sanitize the Bladder: During annual filter changes, homeowners sometimes pour full-strength sodium hypochlorite bleach directly into the tank port. Concentrated chlorine breaks down butyl rubber, causing the bladder to harden, lose elasticity, and leach chemical odors. Always dilute unscented bleach (one tablespoon per gallon of water) or use food-grade hydrogen peroxide sanitizing solutions.
- Throwing Away the Post-Carbon Polishing Filter Too Late: The final inline carbon filter mounted above your storage tank (the stage 5 polishing filter) removes any faint tastes picked up from the rubber bladder. If you empty your tank regularly but forget to change this cartridge annually from your Replacement Filters schedule, your water will taste stale regardless of how clean the reservoir is.
- Failing to Drain the System After Replacing the Membrane: Installing a replacement reverse osmosis membrane without flushing the tank is a common error. New membranes are packed with food-grade preservation solutions that keep the polyamide film stable during shipping. You must discard the first two full tanks of water to wash out these preservation agents before drinking.
- Ignoring Leaks Around the Top Tank Ball Valve: Plastic quarter-turn ball valves threaded onto the stainless steel tank nipple use NPT threads sealed with Teflon tape. Moving the tank around under your sink to empty or inspect it can loosen this connection, creating slow leaks that damage your cabinet floor. Always support the valve firmly when attaching or removing 1/4-inch tubing.
Essential Sourcing Checklist: Bladders, Air Charges, and Replacements
If you are maintaining a tank-based system or considering an upgrade, review these technical factors before making your purchase:
1. Confirm NSF/ANSI Standard 58 Certification
Never purchase a generic, unbranded replacement tank online. Ensure the tank is independently certified to NSF/ANSI Standard 58 for drinking water treatment systems. This certification verifies that the steel shell meets pressure safety standards, the internal lining is virgin polypropylene, and the flexible diaphragm will not leach toxic plasticizers into your water.
2. Match Tank Volume to Household Consumption
Storage tanks are typically labeled by their total exterior volume, not their water-holding capacity. A standard "4-gallon" tank holds roughly 2.5 to 3.2 gallons of water; the rest of the internal volume is occupied by the compressed air cushion. For an average family of four, a 3.2-gallon holding capacity is ideal. Choosing an oversized 10-gallon commercial tank for a single individual simply guarantees water stagnation, because you will never consume enough water to cycle the reservoir naturally.
3. Test the Schrader Valve Integrity Annually
The air valve core at the base of the tank can degrade over time, similar to a car tire stem. During your annual filter replacement, unscrew the protective cap and dab soapy water over the valve pin. If bubbles appear, the internal valve core is leaking. You can tighten or replace the core using an inexpensive automotive valve stem tool rather than buying a new tank.
4. Keep Microplastic and Sediment Pre-Filtration Fresh
Fine sediment and particulate debris that slip past low-grade pre-filters can accumulate inside the bottom of the storage tank, scratching the membrane and degrading the bladder. Pair your system with quality sediment stages featured in our analysis of the Best Water Filter for Microplastics to ensure only clean water enters your storage reservoir.
Expert Water Specialist's Recommendation
In our professional assessment as water quality technicians, a tank-based reverse osmosis system is an effective, economical way to secure high-purity drinking water, but only if you maintain the storage reservoir properly. A pressurized storage tank is not a passive metal box; it is an active mechanical component containing an elastic rubber bladder that requires regular cycling and occasional flushing.
Make it a habit to empty a reverse osmosis tank every two to four weeks. Simply flip open the counter faucet before you go to bed or while doing weekend chores, let the reservoir drain completely, and let the system refill with fresh water. If you are away on vacation for four days or more, flush the tank upon returning. If you are tired of monitoring air bladders, checking Schrader valves, and sacrificing under-sink cabinet space, we recommend upgrading to an advanced direct-flow unit or an ultra-compact ultrafiltration system like the Puflow TM8-2. Whichever path you choose, staying on top of your maintenance routine ensures every glass of water from your tap is clean, safe, and refreshing.
Frequently Asked Questions
In normal household operation, you should completely empty a reverse osmosis tank every 2 to 4 weeks. This flushes stagnant water, exercises the internal butyl rubber bladder, prevents microbial biofilm accumulation, and clears early total dissolved solids (TDS) creep from settling inside the bottom reservoir.
No, draining the tank does not damage the bladder. In fact, keeping the bladder fully stretched under maximum hydrostatic pressure for months at a time causes premature elastomer fatigue. Fully emptying the tank allows the butyl diaphragm to relax and flex, which prolongs its functional working lifespan.
Yes. If your reverse osmosis system sits unused for four or more consecutive days, you must completely drain the tank and let it refill once or twice before drinking. Water standing stagnant against a synthetic rubber bladder without active flow can develop flat odors, bitter mineral off-tastes, and elevated bacterial counts.
A heavy tank that yields little to no water is waterlogged. This occurs when the pressurized air chamber beneath the bladder loses its 7 to 8 psi pre-charge through the Schrader valve, or the internal bladder has ruptured entirely, leaving insufficient air pressure to push the stored water out through the dedicated faucet.
Authoritative Standards & Industry Citations
- NSF International: NSF/ANSI Standard 58 for Reverse Osmosis Drinking Water Treatment Systems
- Water Quality Association (WQA): Best Practices for Residential Water Filtration Maintenance & Sanitization
- U.S. Environmental Protection Agency (EPA): Ground Water and Drinking Water Filtration Systems Guidance